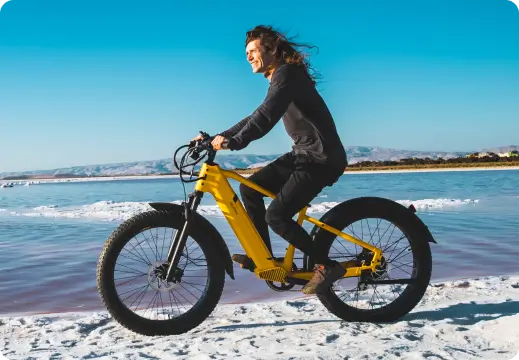




If you weigh more than the average rider most ebikes are designed around, shopping for an electric bike can feel like reading between the lines. This guide is built to change that. Read it start to finish, or jump straight to the buyer's checklist near the bottom to evaluate a specific model you're already considering.
How to read the star ratings:
Each subsection below is tagged with a rough importance level specifically for heavier riders — not a general ebike-shopping priority, but how much that factor tends to affect performance, safety, or comfort once rider weight increases.
- ★★★ — High impact. Worth prioritizing even if it means compromising elsewhere.
- ★★☆ — Meaningful.
- ★☆☆ — Nice to have.
These are relative within each topic area (e.g., within "Motor and Drivetrain"), not an absolute ranking across the entire guide.
1. Understand the Weight Ratings — Before Anything Else
(1.1) Total Payload Capacity vs. Frame Weight Rating ★★★
A brand's advertised "weight capacity" is usually total payload — rider weight plus cargo, bags, and accessories. Since most listings only give one total payload figure, work backward from your own weight:
| Your Weight (body only) | Look for a Total Payload Rating of at Least |
|---|---|
| Under 200 lbs | 300 lbs |
| 200–250 lbs | 350 lbs |
| 250–300 lbs | 400 lbs |
| 300–350 lbs | 450 lbs |
| 350 lbs+ | 500 lbs, and confirm frame testing directly with the manufacturer |
A rack is often rated for just 15–20% of the total payload figure. As a practical shopping rule, aim for a stated payload capacity approximately 15% to 20% above your expected everyday load when suitable options are available.
(1.2) Component-Level Weight Ratings ★☆☆
Check these individually, not just the headline number:
- Wheels and rims — take more stress than the frame rating alone implies
- Seat post and saddle rails — a common failure point
- Rear rack capacity — see the estimation approach above
- Kickstand load rating — easy to ignore, but real bikes fail here
The rear rack deserves special attention. An ebike may support a large rider while its rack is limited to 50 or 60 pounds. That rack limit cannot be ignored simply because the total payload rating is higher.
2. Motor and Drivetrain: What Actually Moves You
(2.1) Hub Motor vs. Mid-Drive Motor ★★☆
A heavier total load requires more energy to accelerate and climb, but the type of motor you choose can change the riding experience more than raw wattage alone.
| Consideration | Hub motor | Mid-drive motor |
|---|---|---|
| Power delivery | Drives the wheel directly | Sends power through the bicycle drivetrain |
| Climbing | Strong when properly sized, but cannot use the bike’s gears | Can use the bike’s gears to climb efficiently |
| Starting under load | Often strong with suitable controller tuning or throttle | Responsive, but correct gear selection matters |
| Drivetrain wear | Motor doesn't add force through the chain | Motor torque increases chain and cassette wear |
| Maintenance | Motor is relatively isolated, but wheel service can be more involved | Easier wheel service, but motor-system repairs may cost more |
| Ride feel | Often feels more like being pushed | Usually feels more like amplified pedaling |
| Best fit | Commuting, cruising, utility riding, moderate hills | Steep or sustained hills, trail riding, frequent climbing |
Mid-drive motors have the edge for heavier riders who regularly climb hills or carry cargo. But both hub and mid-drive motors have their own advantages, and both can be found in ebikes suitable for heavy riders. The best choice depends on a combination of factors rather than motor type alone.
(2.2) Torque vs. Wattage: Reading Spec Sheets Correctly ★★★
Wattage measures energy draw. Torque (Nm) measures the rotational force that actually gets a heavier rider up a hill. Two motors can share the same wattage and perform very differently if torque output differs.
As a rough reference for what torque actually gets you as a heavier rider:
| Torque (Nm) | What It Typically Handles | Good Fit For |
|---|---|---|
| 40–60 Nm | Flat to gently rolling terrain, light loads | Lighter riders, flat commutes |
| 60–80 Nm | Moderate hills, occasional cargo | Average-weight riders, mixed terrain |
| 80–100 Nm | Steep or sustained climbs with a heavier rider on board | Heavier riders on hilly routes |
| 100–120 Nm | Steep climbs plus cargo or passenger load | Heavier riders who regularly carry gear |
| 120+ Nm | Sustained steep grades under maximum payload | Cargo-focused or off-road use at higher rider weights |
Treat these as directional, not exact thresholds. Actual hill-climbing performance also depends on gearing, motor placement (hub motor vs. mid-drive motor), and total bike-plus-cargo weight.
(2.3) Sensor Type: Cadence vs. Torque Sensing ★☆☆
- Cadence sensors apply a preset assist once you're pedaling, regardless of effort
- Torque sensors scale assist to how hard you're actually pushing
When comparing a cadence sensor vs torque sensor, the main difference is how each system delivers assistance. A torque sensor responds to how hard you pedal, providing smoother starts, more natural acceleration, and better control on hills. A cadence sensor activates a preset level of assistance once the pedals begin turning, allowing the rider to keep moving with relatively little effort.

For heavier riders, torque sensing often provides more predictable control, while cadence sensing may suit riders with limited fitness, sensitive joints, or anyone seeking a lower-effort way to become more active. In the comparison, neither option is universally better.
(2.4) Gearing and Drivetrain Durability ★★☆
Heavier riders wear through chains, cassettes, and derailleurs faster. A mid-tier or higher drivetrain holds up better and shifts more reliably under sustained load.
3. Frame and Structural Integrity
(3.1) Frame Material ★★☆
| Material | Advantages | Tradeoffs |
|---|---|---|
| Aluminum alloy | Common, corrosion-resistant, relatively light | Usually less easily repaired after structural damage |
| Steel | Durable, compliant ride feel, potentially repairable | Heavier and requires corrosion protection |
| Carbon fiber | Can be strong and light when properly engineered | Expensive and damage may be difficult to identify or repair |
None of these materials is automatically unsafe for a heavier rider. The manufacturer’s stated rating and testing are more meaningful than the material name. A properly designed aluminum frame can be more suitable than an unrated steel frame, and a tested carbon frame can be stronger than its appearance suggests.

(3.2) Frame Geometry ★★★
A step-through frame makes mounting easier, especially for riders with limited hip or knee mobility. Because removing the top tube changes the structural layout, a high-capacity step-through bike requires careful engineering and reinforcement. Don't assume that step-through automatically means weaker.

A longer wheelbase generally improves straight-line stability, while a shorter bike may feel more agile. Low-mounted batteries and motors help keep the center of gravity manageable. Extremely tall racks, batteries, or cargo can make a bike feel top-heavy even when the total weight remains within its limit.
The right geometry should let you:
- Mount without excessive hip movement
- Stand over the frame safely
- Reach the bars without locking your elbows
- Keep the front wheel controlled at low speed
- Place at least one foot securely on the ground when stopped
Certification and Testing Standards ★★★
The ISO 4210 series covers safety and performance requirements and test methods for conventional bicycle components such as frames, forks, wheels, brakes, steering systems, and seatposts. ISO/TS 4210-10 addresses electrically power-assisted cycles, while EN 15194 is widely associated with European EPAC requirements.

In North America, UL Certification evaluates the ebike’s electrical drive system, battery, and charger combination for electrical and fire hazards. It shouldn't be interpreted as proof that the frame supports a particular rider weight. Mechanical and electrical certifications answer different safety questions.

4. Wheels and Tires
(4.1) Tire Width and Type ★★★
Four-inch fat tires are a popular choice among heavier riders because their greater air volume and wider contact patch can provide a more planted feel, improved traction, and additional cushioning over uneven surfaces. This catogory is especially useful on sand, snow, loose gravel, or broken pavement. However, it isn't mandatory for every heavier rider, and tire load rating, casing strength, rim compatibility, and correct inflation pressure remain equally important.

For mostly paved riding, a well-supported 2.2- to 3-inch tire may provide more precise handling, lower rolling resistance, and easier replacement. Fat tires add weight and drag, which can reduce range and make the bike harder to pedal without motor assistance. Heavier riders may also need slightly higher tire pressure to prevent excessive deformation or pinch flats, while remaining within the manufacturer’s recommended range.
Choose tread according to the route:
- Smoother center tread for pavement and bike paths
- Mixed tread for pavement, gravel, and park trails
- More aggressive knobs for loose dirt, mud, or snow
(4.2) Rim and Spoke Considerations ★★★
A wider rim supports a wide tire more effectively and reduces excessive sidewall movement. A double-wall rim is generally preferable to a basic single-wall rim for repeated heavy use.
Many ebikes use 32 or 36 spokes. A 36-spoke wheel can distribute load across more spokes, but spoke count alone doesn't determine strength. A professionally built 32-spoke wheel with an appropriate rim, quality spokes, and even tension can outperform a poorly assembled 36-spoke wheel.
For an ebike for heavy riders, look for:
- At least 32 spokes per wheel
- Double-wall rims
- Stainless-steel spokes from a recognized supplier
- Appropriate spoke gauge or butted-spoke design
- Published tire and rim compatibility
- Replacement spokes that are readily available
Have spoke tension inspected after the first few hundred miles. New wheels can settle during early use, and loose spokes should be corrected before they begin breaking.
(4.3) Tire Pressure Guidance ★★☆
Run pressure toward the higher end of the recommended range to avoid sidewall flex and pinch flats. Riders above 220 lbs often do best in the top third of that range — fine-tune from there.
5. Suspension ★★★
Suspension isn’t required just because the weight, but it improves control and comfort off-road. For heavier users it becomes more important, and a full-suspension ebike is often preferred for better stability and control on rough terrain.
| Setup | Best suited to | Main tradeoff |
|---|---|---|
| Rigid fork | Smooth roads and simple commuting | Less impact isolation |
| Front suspension | Mixed pavement, potholes, gravel | Added weight and maintenance |
| Full suspension | Rough trails and repeated impacts | Higher cost, weight, and complexity |
For pavement, high-volume tires and a suspension seatpost may provide enough comfort without the cost of full suspension. Full suspension becomes more useful when both wheels regularly encounter roots, rocks, drops, or rough trail surfaces.
An air fork can often be adjusted for rider weight by changing air pressure and rebound settings. A coil fork requires a spring rate and preload range appropriate to the load. A fork that is too soft may sag excessively or bottom out; one that is too firm will provide little useful movement.
Don't evaluate suspension by travel alone. For urban and mixed riding, approximately 60–100 mm of front travel is usually sufficient. More travel is intended for increasingly rough terrain. Confirm the suspension manufacturer’s limits and ask whether the recommended setup can achieve appropriate sag at your riding weight.
6. Braking System
(6.1) Mechanical vs. Hydraulic Disc Brakes ★★★
| Feature | Mechanical disc brakes | Hydraulic disc brakes |
| Operation | Cable pulls the caliper | Fluid transfers lever pressure |
| Lever effort | Usually higher | Usually lower |
| Modulation | Adequate, but depends on setup | Generally smoother and easier to control |
| Adjustment | More frequent cable adjustment | Automatic pad compensation on many systems |
| Field repair | Relatively straightforward | Requires fluid-specific tools and knowledge |
| Best use | Flat routes and budget-focused builds | Heavier loads, hills, higher speeds, frequent riding |
When comparing mechanical vs hydraulic disc brakes, well-adjusted mechanical brakes can work, but hydraulic systems generally require less hand force and provide smoother, more consistent braking for a heavy-duty ebike. For steep terrain or cargo use, four-piston calipers paired with larger rotors can offer greater stopping control and improved heat management.
(6.2) Rotor Size Matters More Than People Think ★★★
Larger rotors provide more braking leverage and greater surface area for heat management. Shimano notes that 180 mm and 203 mm rotors provide more braking force than comparable 160 mm rotors in compatible systems.

For heavier riders, 180 mm rotors are a sensible minimum to consider, particularly on hilly routes. A 203 mm front rotor, or 203 mm rotors at both ends, may be useful for steep descents, higher speeds, or substantial cargo. However, the frame, fork, hub, adapter, and caliper must all approve the selected rotor size. Never install a larger rotor solely because it fits physically.
(6.3) Brake Pad Compound ★☆☆
- Resin — quieter, gentler on rotors, wears faster under heavy braking
- Metallic/sintered — more durable, better in wet conditions, noisier
Resin or organic pads are usually quieter and offer smooth initial bite, but they may wear faster or fade sooner under sustained heat. Metallic or sintered pads generally last longer and handle wet conditions and heat better, although they can be noisier and may require compatible rotors.
Inspect the pads more frequently if you ride in hills, rain, grit, or stop-and-go traffic. Replacement should be based on measured pad thickness and manufacturer guidance, not a fixed mileage interval.
7. Battery and Range Planning
Published maximum range is usually achieved under favorable test conditions. A heavier total load increases the energy required for acceleration and climbing, but there is no honest universal percentage by which rider weight reduces range.

For conservative trip planning, begin with approximately 60% to 70% of the advertised maximum range. Then leave additional reserve for cold weather, steep hills, high assist, or throttle use. This is a planning method, not a prediction of battery performance.
(7.1) Comparing battery specifications ★★★
Battery capacity is measured in watt-hours:
Watt-hours = volts × amp-hours
A 48V, 15Ah battery stores approximately 720Wh. A 52V, 14Ah battery stores approximately 728Wh. Comparing amp-hours alone would make these batteries look less similar than they actually are.
A useful planning formula is:
Estimated range = usable battery watt-hours ÷ expected watt-hours per mile
Real consumption may range from the low teens in efficient conditions to well above 30Wh per mile during fast riding, heavy throttle use, cold weather, or steep climbs. Until you have personal ride data, calculate a conservative range and keep at least 20% battery in reserve.
(7.2) Battery care ★☆☆
- Avoid storing at very low charge for long periods
- Charge and store in moderate temperatures
- Heavier riders draw more power per mile, so consistent charging habits matter more
Battery makers provide model-specific instructions. As one reference, Bosch recommends storing certain ebike batteries at approximately 30% to 60% charge in a dry environment between 32°F and 68°F when they will not be used for an extended period. Always follow the guidance for your own battery.
(7.3) Removable vs fixed batteries ★☆☆
Removable batteries are easier to charge indoors and swap for spares. Fixed batteries often integrate better for weight distribution and mounting security.
8. Comfort and Ergonomics
(8.1) Seat and Saddle Considerations ★★☆
For heavier riders, the right saddle helps distribute pressure across the sit bones instead of concentrating it on sensitive soft tissue. A slightly wider saddle can provide better support, especially with an upright riding position, but wider is not always better. The ideal width should match both the rider’s sit-bone spacing and riding posture.

Padding also matters, but an extremely thick or soft saddle can compress unevenly, create pressure points, and cause chafing on longer rides. Look for firm, high-density foam or supportive gel padding that holds its shape under greater weight. A strong saddle base, durable rails, and a seatpost rated for the rider’s total load are equally important. For riders with lower-back or joint discomfort, a properly rated suspension seatpost can further reduce repeated impacts from bumps and uneven pavement.
(8.2) Handlebar and Riding Position ★★☆
- Upright position — reduces wrist and lower-back strain, better for longer rides
- Forward-leaning position — better for speed, more pressure on hands and wrists
- Wider bars — more control and stability

An upright position reduces pressure on the hands and can improve visibility. A more forward position distributes weight between the saddle and handlebars and may feel better on longer or faster rides. Adjustable stems and swept-back handlebars can help, but extreme stem extension may negatively affect handling.
(8.3) Standover Height and Frame Fit ★★★
Use both height and inseam to choose the correct frame size. A bike may match your height but still have a top tube that sits too close to your inseam, making starts, stops, and emergency dismounts uncomfortable. This is especially important for heavier riders, who may need more room to shift their weight and place both feet securely on the ground.

Aim for at least 1–2 inches of clearance between your inseam and the top tube when standing over the bike, with more clearance preferred for uneven terrain. A step-through or low-step frame can make mounting and dismounting easier, but it should still feel rigid and stable under load. Also check the bike’s reach, handlebar position, and saddle-adjustment range, since proper frame fit should allow an upright, balanced posture without excessive pressure on the wrists, hips, or lower back.
9. Legal Classification and Speed ★★★
In the common U.S. three-class model:
| Class | Motor assistance | Typical assisted-speed limit |
| Class 1 | Pedal assist | 20 mph |
| Class 2 | Throttle and usually pedal assist | 20 mph |
| Class 3 | Primarily pedal assist | 28 mph |
These ebike classifications and rules vary significantly across regions, and riders in this category may be more likely to consider higher-powered or non-compliant models when choosing an ebike. For this reason, it’s important to start from a broad regulatory perspective and first understand the specific ebike laws in your state.

A throttle can help a heavier rider start at an intersection, stabilize the ebike before pedaling, or restart on an incline. It can also increase energy consumption and may restrict trail access. If throttle assistance is important, check whether it works from a standstill, whether its speed is limited, whether it can be removed or disabled, and whether that configuration changes the ebike’s legal classification.
10. Safety Features Worth Prioritizing
(10.1) Lighting and Visibility ★☆☆
Integrated lights are more reliably positioned and wired than aftermarket add-ons — worth it if you ride at dawn, dusk, or in traffic.
(10.2) Kickstand Design ★★☆
A standard single-leg kickstand may be less stable when supporting a heavier ebike, especially if the bike is carrying groceries or other cargo. Look for a sturdy kickstand with a wide foot and a weight rating appropriate for the bike’s total loaded weight. A centrally mounted dual-leg kickstand creates a broader support base, making the bike more stable while parking, loading cargo, or making adjustments. However, riders should not sit on the bike while it is supported by the kickstand unless the manufacturer specifically allows it.
(10.3) Fenders and Chain Guards ★☆☆
Easy to overlook, genuinely useful — fenders cut road spray, chain guards protect clothing and reduce maintenance.
11. Sizing, Fit, and Test Riding ★★★
Record three measurements before shopping:
- Body weight: Include normal riding accessories.
- Height: Use it to narrow the manufacturer’s size range.
- Inseam: Measure barefoot from the floor to the crotch using a book held firmly between the legs.

Then compare your measurements with the manufacturer’s geometry chart. Don't rely only on labels such as medium or large.
Test riding matters more when the bike is carrying a heavier load because poor fit and vague handling become more noticeable. A short ride around a showroom may reveal saddle height, but it will not show how the bike behaves on real roads.
During the test ride, evaluate:
- Starting: Can you begin smoothly without the motor surging?
- Low-speed control: Can you make a tight turn without wobbling?
- Braking: Can you stop firmly without excessive lever effort?
- Climbing: Can the motor maintain assistance without slowing dramatically?
- Cornering: Do the tires and frame feel controlled rather than flexible?
- Mounting: Can you get on and off without catching your foot?
- Fit: Are your wrists, shoulders, knees, and hips comfortable?
- Parking: Can you hold and position the bike when the motor is off?
If possible, test a hill, rough pavement, a controlled emergency stop, and a slow U-turn. Ask the dealer to set tire pressure, suspension, saddle position, and handlebar angle for you before judging the ebike.
12. Cost, Warranty, and Long-Term Ownership
(12.1) Upfront Price vs. Total Cost of Ownership ★★☆
The lowest purchase price doesn't always produce the lowest ownership cost. A cheaper heavy-duty ebike may become expensive if it uses unusual tires, proprietary electronics, unsupported batteries, or brake components that local shops cannot service.
For example, an underbuilt drivetrain or brakes can cost more over time in parts and service. Larger riders wear through consumables faster than average.
(12.2) Warranty Coverage for Heavier Riders ★★☆
Read the warranty exclusions carefully. Confirm that your expected load is within the covered use conditions and that commercial use, cargo, off-road riding, water exposure, or modifications don't cancel coverage.
Ask whether the warranty covers parts only or also labor. A free replacement motor is less helpful if you must pay substantial shipping and installation costs.
(12.3) Availability of Replacement Parts ★☆☆
Established brands generally offer easier access to parts and service — worth weighing against a niche brand with better specs on paper.
Common Buying Mistakes to Avoid
Before placing an order, make sure you are not:
- Comparing payload numbers without reading their definitions
- Choosing a bike that leaves no capacity for cargo
- Comparing motor wattage while ignoring torque, gearing, and controller tuning
- Assuming a mid-drive is automatically the best choice
- Treating fat tires as proof of a strong wheelset
- Ignoring spoke count, rim construction, and wheel servicing
- Buying a frame size that is too small because it feels easier to mount
- Overlooking the separate limits of racks, seatposts, and kickstands
- Assuming electrical certification proves frame strength
- Calculating range from the advertised maximum alone
- Ordering without checking replacement battery availability
- Skipping a real test ride when one is available
Ebike for Heavy Riders Buyer’s Checklist
Use this checklist to compare models side by side.
| Buying question | Target or action | Confirmed |
|---|---|---|
| What is my normal payload? | Add rider, gear, accessories, and cargo | ☐ |
| Is there a useful capacity margin? | Aim for roughly 15%–20% when practical | ☐ |
| Is the published rating clearly defined? | Distinguish rider, payload, and system weight | ☐ |
| Are component limits available? | Check wheels, fork, seatpost, racks, and tires | ☐ |
| Is the motor appropriate for my route? | Compare torque, gearing, sustained output, and hills | ☐ |
| Is the torque sufficient? | Consider 60–80 Nm for moderate hills and 80 Nm+ for frequent steep or loaded riding | ☐ |
| Does the assistance feel controllable? | Test the sensor response and throttle behavior | ☐ |
| Is the drivetrain suitable? | Look for a useful low gear and serviceable parts | ☐ |
| Is mechanical testing documented? | Request the relevant standard, test weight, and laboratory | ☐ |
| Is the electrical system certified? | Look for verifiable UL 2849 or applicable regional certification | ☐ |
| Are the wheels well constructed? | Prefer at least 32 spokes, suitable rims, and replaceable spokes | ☐ |
| Are the brakes appropriate? | Prefer hydraulic discs and consider 180–203 mm compatible rotors | ☐ |
| Will the battery cover my route? | Plan from Wh, realistic consumption, and a 20% reserve | ☐ |
| Does the frame fit? | Check height, inseam, reach, and standover | ☐ |
| Have I tested the bike? | Test starts, hills, corners, braking, and low-speed balance | ☐ |
| Can I maintain it locally? | Confirm shops, parts, battery supply, and warranty labor | ☐ |
| Is it legal for my route? | Check state, local, and trail-specific class rules | ☐ |
An ebike doesn't have to meet the highest possible specification in every row. The goal is to match its capabilities to your load, terrain, range, mobility, and maintenance options.
A Strong Option for Heavy Riders: Velotric Nomad 2X
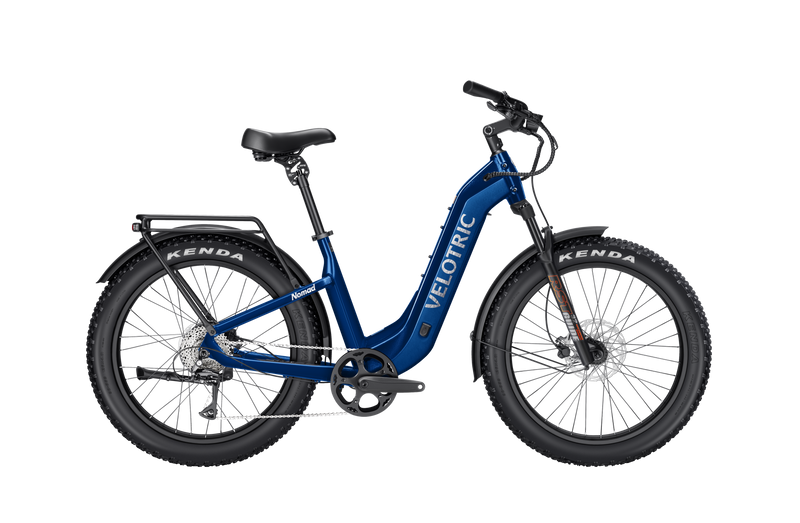
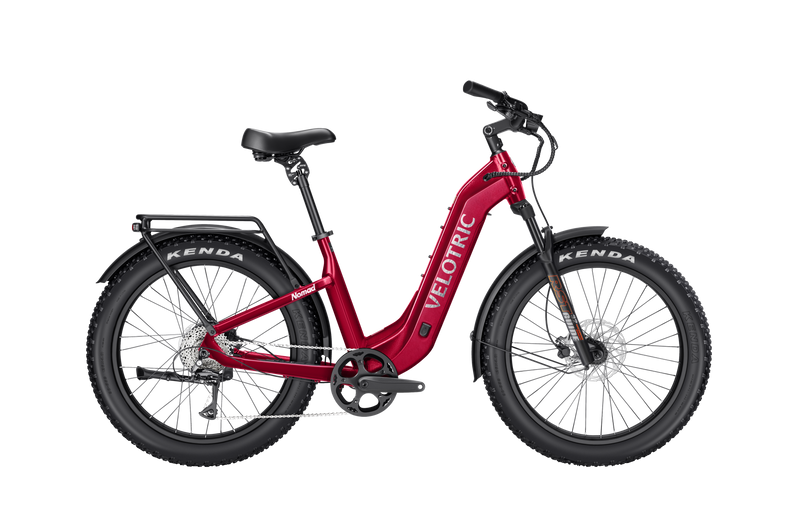
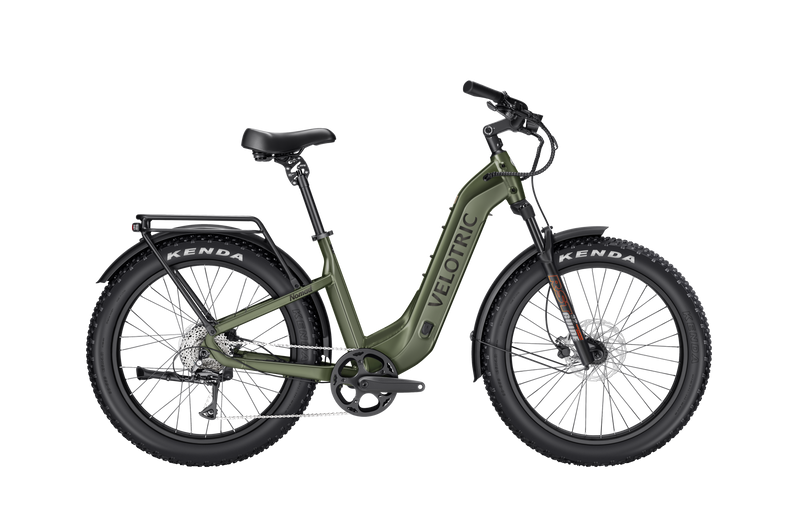
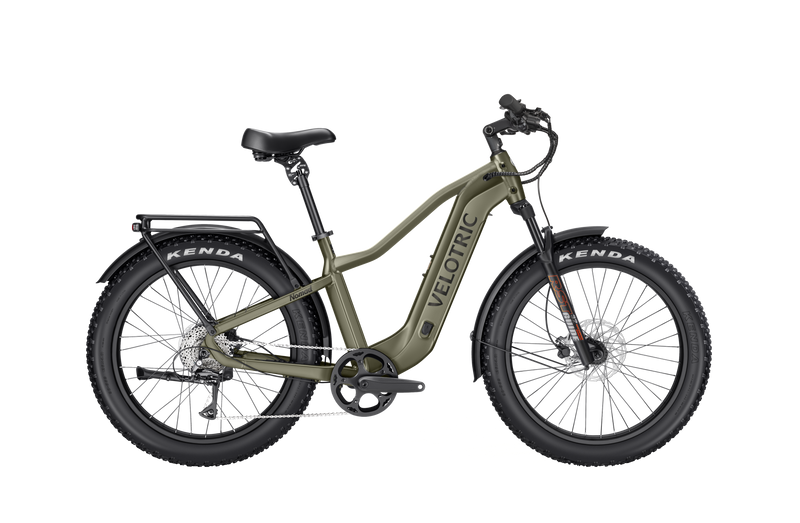
For riders looking for a practical example of these features in one bike, the Velotric Nomad 2X is worth considering. It supports up to 560 lbs and combines a 750W motor with 105 Nm of torque for confident starts and hill climbing. Full air suspension, 4-inch fat tires, and hydraulic disc brakes provide added comfort and control, while the battery delivers up to 75 miles of pedal-assist range. With step-through and high-step options available, the Nomad 2X is especially suitable for heavier riders who want a stable, powerful ebike for both everyday roads and rougher terrain.
Frequently Asked Questions
What weight capacity should I look for as a 250+ lb rider?
Calculate your total regular payload rather than using body weight alone. A 260-pound rider with 15 pounds of clothing and equipment and 25 pounds of cargo creates a 300-pound payload. A bike rated for at least 350 pounds would provide more practical room than one rated for exactly 300 pounds.
Confirm whether the advertised capacity includes the bike itself. Also check the rack, fork, wheels, seatpost, and tire ratings. For a 300-pound rider or an ebike for a 400 lb person, this component-level confirmation becomes especially important because a large headline capacity may not represent the maximum rider weight.
Is a mid-drive motor always better for heavy riders?
No. A mid-drive is often the better choice for long, steep hills because it uses the bicycle’s gears. It can also provide balanced weight distribution and a natural pedal feel.
A hub motor may be more practical for flat or moderately rolling routes, particularly when simplicity, lower drivetrain wear, or throttle-assisted starts are priorities. Compare the complete system rather than choosing solely by motor location.
How much does rider weight reduce battery range?
There is no fixed percentage. Additional weight has a relatively modest effect on steady riding across flat ground but a much larger effect during repeated acceleration and climbing. Speed, wind, temperature, tire pressure, assist level, and elevation can have equal or greater effects.

For initial planning, use approximately 60% to 70% of the advertised maximum range, leave a 20% reserve, and adjust after recording several rides. A display that tracks watt-hours, battery percentage, or energy consumption can help you build a more accurate personal estimate.
Are cheaper heavy-duty ebikes worth considering?
Some are, provided the manufacturer clearly documents capacity, certification, components, warranty coverage, and replacement parts. A lower price may reflect direct-to-consumer distribution or simpler components rather than unsafe construction.
Be cautious when the low price is paired with vague testing claims, unknown battery cells, unverified electrical certification, weak brakes, an unsupported wheelset, or no replacement battery supply. Evaluate total ownership cost rather than purchase price alone.
How often should a heavier rider replace brake pads and tires?
There is no universal mileage schedule. Wear depends on terrain, speed, braking style, weather, tire compound, pressure, and total load.
Inspect tires regularly for cuts, casing damage, exposed threads, uneven wear, or repeated loss of pressure. Check brake-pad thickness and rotor condition according to the component manufacturer’s instructions. Riders who descend hills, commute in rain, or carry cargo should inspect both more frequently than casual flat-road riders.
Final Buying Priorities
There is no single specification that makes an ebike suitable for every heavier rider. A 250-pound commuter on flat bike paths has different needs from a 350-pound rider climbing steep roads or carrying groceries. The right bike is the one whose complete system matches your body, route, cargo, comfort needs, and maintenance options.
Once you have narrowed the choices, compare the specifications using the checklist and arrange a properly adjusted test ride. A few minutes spent evaluating starts, stops, hills, and low-speed handling can reveal more than the largest number on a product page.