

You wouldn’t run 10 miles in shoes that didn’t properly fit your feet, right? So, why would you cycle 10 miles on a bike that doesn’t properly fit your body?
Bike fitting refers to the process of making sure a bike is appropriately set up based on your height and riding style.
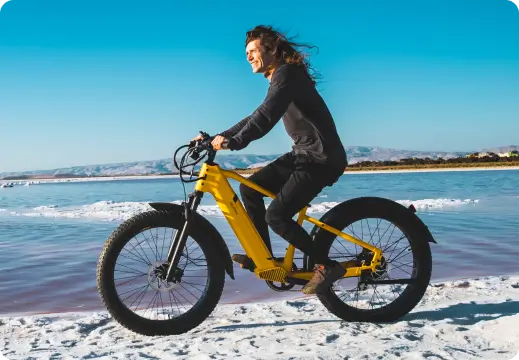
Whether you’re racing through city streets on a road bike, scaling peaks on a mountain bike, or commuting to and from work on an electric bike, it’s important to tailor your two-wheeled ride to your body.
Below, we explain the benefits of bike fitting for cyclists and take you through a basic fit process to ensure your bike is just right.
Why should you fit your bike?
Bike fitting can make a big difference in terms of safety and comfort. Here are some of the advantages of a well-fitted bike:
- Improve riding posture. A bike that isn’t properly fitted — for example, the handlebars are too high or too low — can affect your riding stance and lead to discomfort and back pain. For instance, lower back pain while riding is likely related to your fit, which may cause increased pressure on the lumbar discs.
- Reduce the risk of knee pain. A poor bike fit — for instance, due to incorrect saddle height or poor pedal positioning — can also result in unnecessary knee pain. When properly set up, cycling can be a great exercise for people with arthritic knees.
- Enhance aerodynamics and performance. A good bike fit can perfect your riding stance and provide better aerodynamics while cycling. This can help reduce wind resistance and pedal drag, resulting in faster (and more fun!) rides.
- Improve safety. A poorly fitted bike doesn’t just increase the risk of physical comfort; it’s a potential safety issue. For example, if your bike isn’t fitted, you may be unable to maneuver around obstacles like pedestrians and cars. Avoid trouble with the right fit.
How to adjust your bike for proper fit
Below, we explain what bike sizing entails. While you can try to DIY this process, it’s usually best to get help from a pro at a local bike shop (we explain why in the next section).
1. Fit your bike for your current riding style
Different cyclists have different riding styles. Some are more aggressive and pedal quickly, while others are slower.
People also vary in their range of motion as they pedal and place pressure on different parts of the pedal with each stroke. Riding style also depends on context (e.g., road biking versus mountain biking).
Consider your riding style, including speed, pedal pressure, and terrain. For example, riders who pedal up hills a lot likely place more pressure on the pedals. Focus on your current riding style, but understand that this may change over time (at which point, you’ll have to follow up and readjust your fit).
2. Ensure your bike is the correct frame size
Before you start bike fitting, ensure you have the right size bike frame. Bikes are not one-size-fits-all.
Different brands may have different specifications in terms of frame style and corresponding size. However, there are some general guidelines you can use.
The below table lays out the basics for beginners:
Road Bike Frame Size Chart
| Rider’s Height | Frame Size | General Marker |
| 4’10”- 5’2” | 47”- 48” | XX-Small |
| 5’2”- 5’6” | 49”- 50” | X-Small |
| 5’3”- 5’6” | 51”- 53” | Small |
| 5’6”- 5’9” | 54”- 55” | Medium |
| 5’9”- 6’0” | 56”- 58” | Large |
| 6’0”- 6’3” | 58”- 60” | X-Large |
| 6’3”- 6’6” | 61”- 63” | XX-Large |
Mountain Bike Frame Size Chart
| Rider’s Height | Frame Size | General Marker |
| 4’11” – 5’3” | 13” - 15” | X-Small |
| 5’3” – 5’7” | 15” - 16” | Small |
| 5’7” – 5’11” | 16” - 17” | Medium |
| 6’0” – 6’2” | 17” - 19” | Large |
| 6’2” – 6’4” | 19” - 21” | X-Large |
| 6’4” and taller | 21”+ | XX-Large |
3. Adjust your shoe cleat position
If your bike cleats (cycling shoes) are set too far apart or too far forward, you may experience knee pain. Cleats that are too far forward can also cause numbness or Achilles pain.
If your cleats are too far back, you won’t be able to use the full range of muscles in your legs. Basically, the shoe cleat’s center should be adjacent to the ball of your big toe. The front tip of the cleat should follow the middle toe’s line.
As for the cleat’s position on the pedal, it should be set up so the main contact point — the ball of your foot — is over the pedal axle.
4. Find the right saddle position
Saddle position depends in part on riding style (back to point one)! If you’re riding a mountain bike or hybrid bike (mixing a mountain and road bike), your riding position is likely more upright. But if you road bike, your upper body is bent lower.
That said, there are some basic rules to keep in mind as you adjust your seat position, including the seat height and tilt.
Saddle angle
Your saddle angle should be even with the ground so the saddle is parallel to the Earth.
If the saddle isn’t properly bolted into place, it may tilt forward or backward. In this case, loosen the saddle binder bolts (also called seat fixing bolts), even out the saddle, and retighten the saddle bolts.
Saddle height
As a general rule of thumb, you should have a bend of 80 to 90 degrees in your knee when you’re at the bottom of the pedal stroke.
Think of your pedal range of motion as a clock. If your foot is at three o’clock, your knee should align over the forefoot (so there’s a straight line from your kneecap to the ball of the foot).
5. Adjust your handlebars
The handlebars also play a big role in a professional bike fit. Consider these components in your bike setup.
Handlebar reach
Your handlebars should be set far enough away so your elbows are slightly bent.
When you grip the handlebars, imagine a piano at your fingertips. Can you “play” it comfortably, reaching the handlebars as if they are keys? If not, make an adjustment.
If the handlebars are too close or far away, a new handlebar stem can help.
Handlebar height
The right handlebar height depends largely on your riding style.
If you’re on a road bike, you should angle your upper body about 45 degrees from the hips, which requires lower handlebars.
For mountain bikes, your position will be more upright, meaning higher handlebars are fine.
Handlebar size
Handlebar size is another consideration in bike fit. As a general rule of thumb, handlebars should be set so your hands are shoulder-width apart when riding.
Again: Riding style makes a difference!
Off-road cyclists may opt for a wider-set handlebar stance for greater stability, while road cyclists may prefer a closer-set stance to improve aerodynamics and speed.

Bike fitting: DIY vs. professional
Now that we’ve outlined the steps of the fit process, you’re probably thinking you can do it yourself.
Not so fast. Although a DIY bike fitting is possible, it’s often best to go to a pro. Why?
A professional bike fitter will have the knowledge to analyze your riding style. A second party has an external view; they can seeif your bike is properly fitted to allow for good posture, riding stance, range of motion, and more.
Unless you’re doing this in front of a mirror, it’s hard to assess those aspects yourself!
Finally, a second pair of hands makes it easier to adapt the bike fit to your body. For example, when adjusting the handlebars, you can remain on the bike while the professional moves them up or down so you can sense what feels right.
There’s no need to hop on and off the bike and make adjustments each time.
OK, but howmuch does this all cost?
Professional fit services can cost from $150 to $200 or more, depending on the type of bike that needs fitting and the length of the consultation.
That might seem like a lot, but look at it as a long-term investment in your riding comfort. Also, some bike shops include a fitting with your bike purchase.
Discover the best Velotric electric bike for you
The right bike fit starts with the best bike. Velotric has an e-bike to suit every need.
For an urban cruiser/commuter bike, try the Discover 1. It features a 500W/900W rated motor. Meanwhile, our Nomad 1 has a 750W motor and fat tires suitable across all terrain..
(Psst, learn more about e-bike motors).
Each bike features a 48V 14.4Ah battery and takes just six hours to charge completely. The Discover 1 has a range of up to 65 miles, while the Nomad 1 has a maximum range of 55 miles.
The bikes and their batteries are certified by Underwriters Laboratories (UL 2271), a global safety standards organization. Plus, they include safety essentials like lights, a bell, and hydraulic disc brakes so you can ride with confidence.
Both the Discover 1 and Nomad 1 come in two styles: The Step-Thru frame is ideal for rider heights 5’1” to 6’4”, while the High-Step frame is ideal for rider heights 5’6” to 6’9”.
With an appropriately sized frame, you’ll be well on your way to achieving the right bike fit.